
This guide walks you through every step of setting up your SablePay merchant account – from creating your account to processing payments and viewing transaction history. Follow along with the screenshots below.
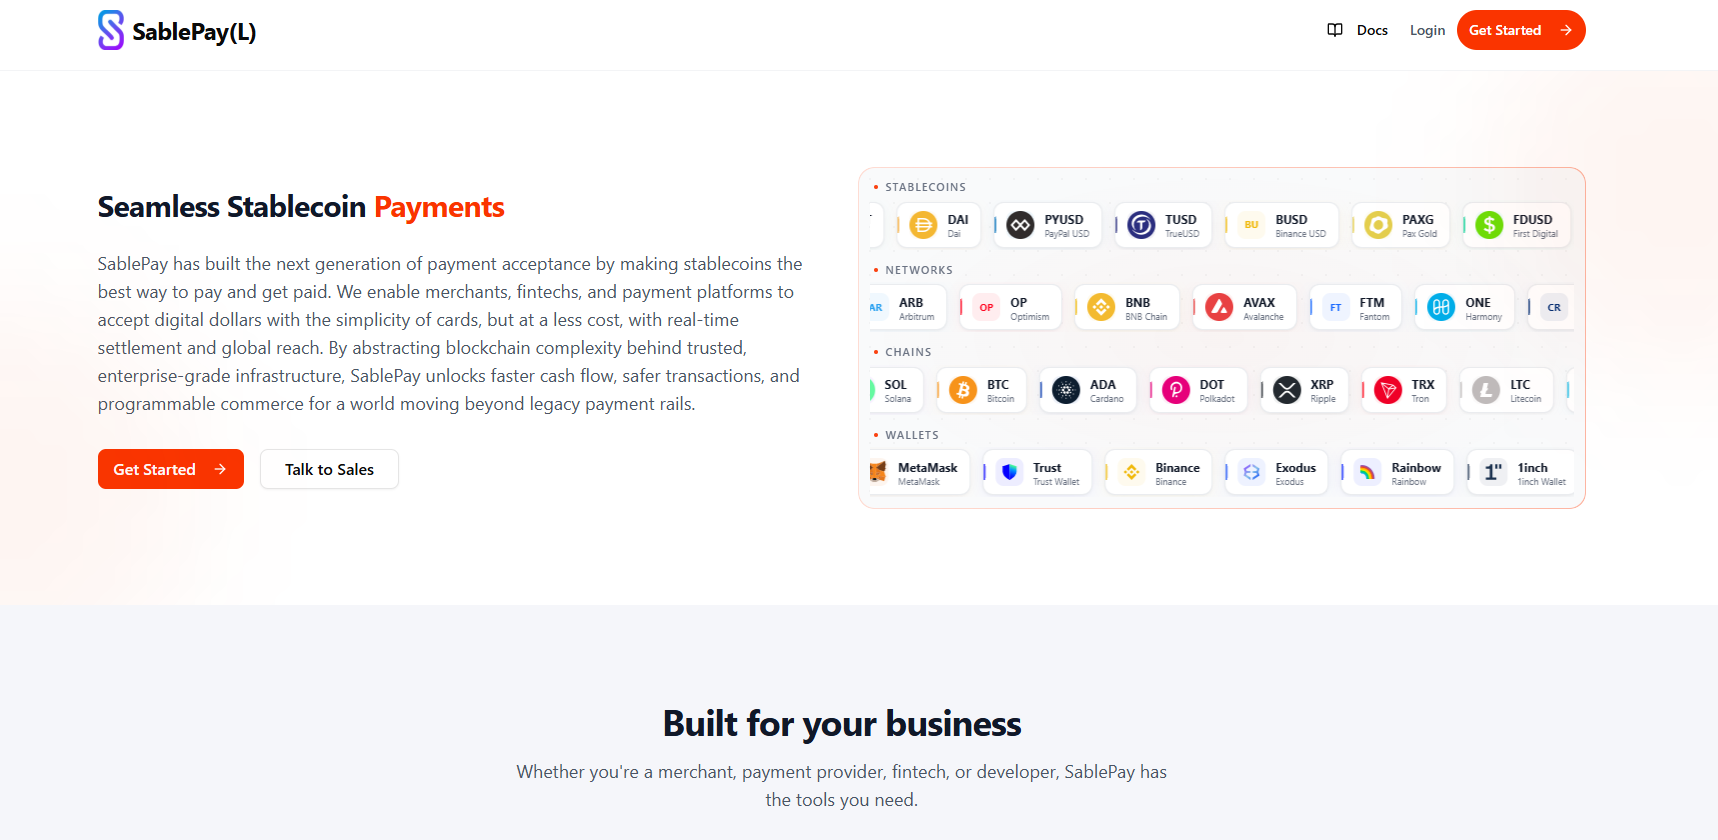
The SablePay public landing page
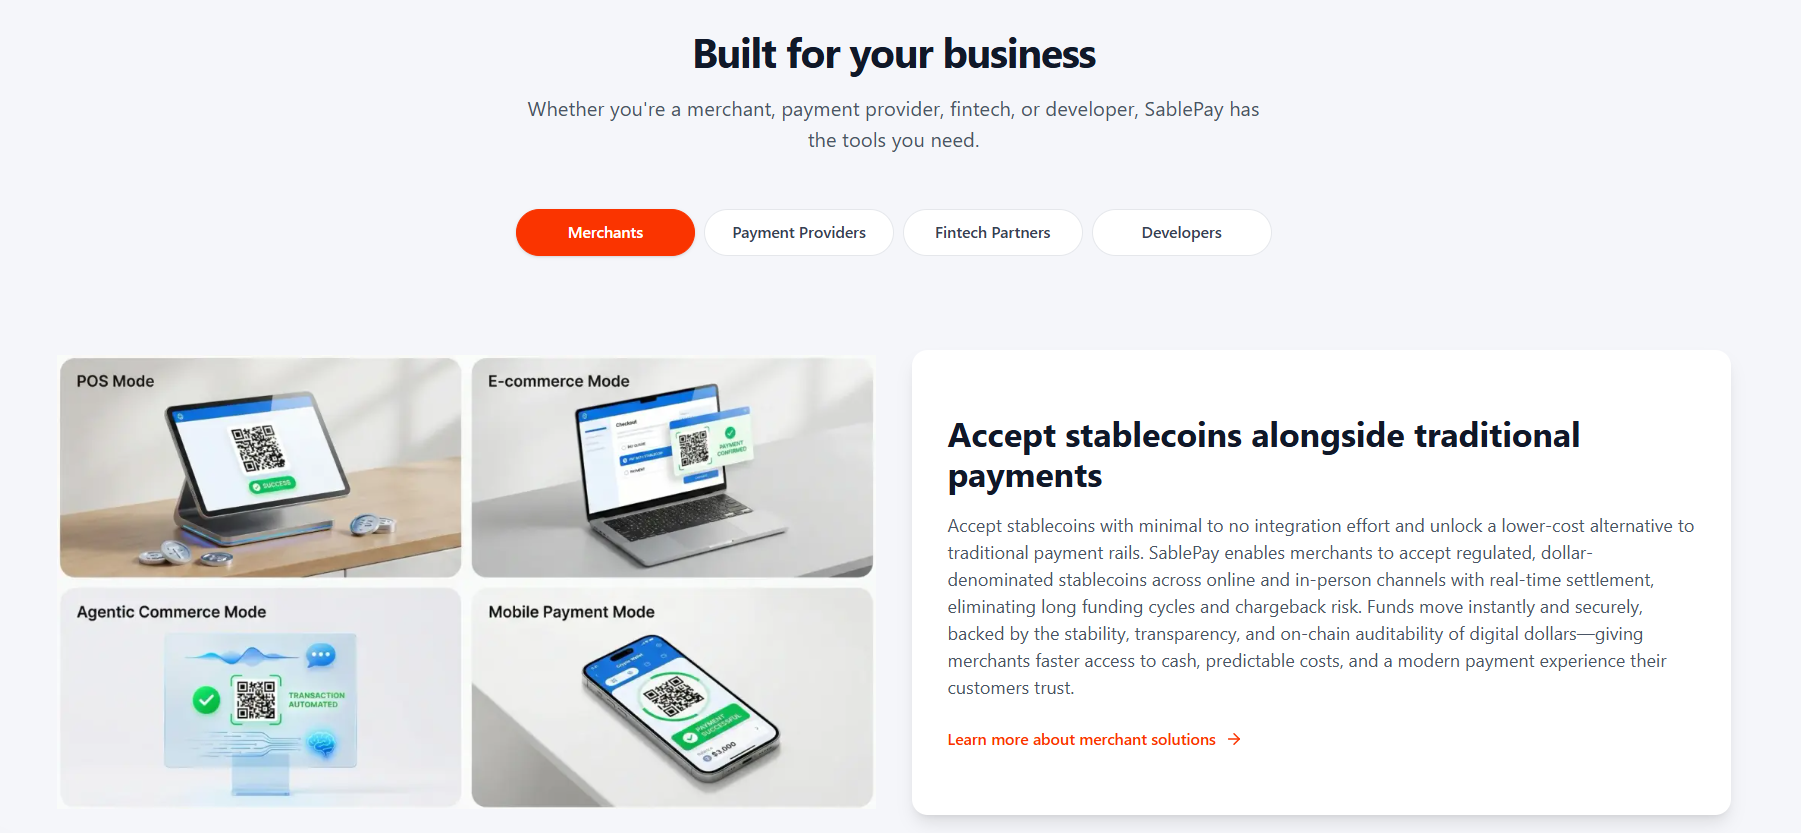
Features and capabilities overview
Your Onboarding Journey
Head to the SablePay registration page to create your merchant account. The signup process uses a simple 3-step wizard.
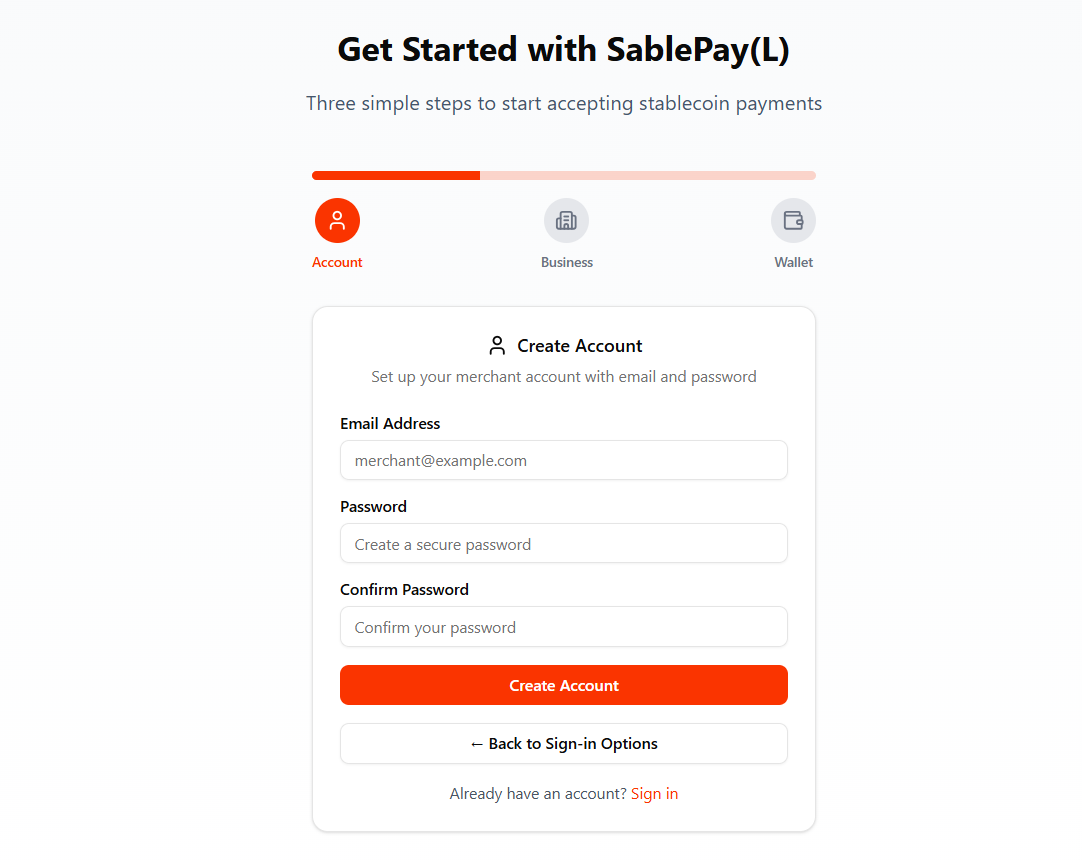
Figure 1: The registration page with email and password signup form
How to Register
- 1Navigate to sablepay.io/onboarding
- 2Click "Sign up with Email" to create a new account
- 3Enter your email address and choose a strong password (minimum 8 characters)
- 4Confirm your password and click "Create Account"
Email Verification
After signing up, you'll receive a 6-digit verification code at your email address. Enter this code on the verification screen to activate your account.
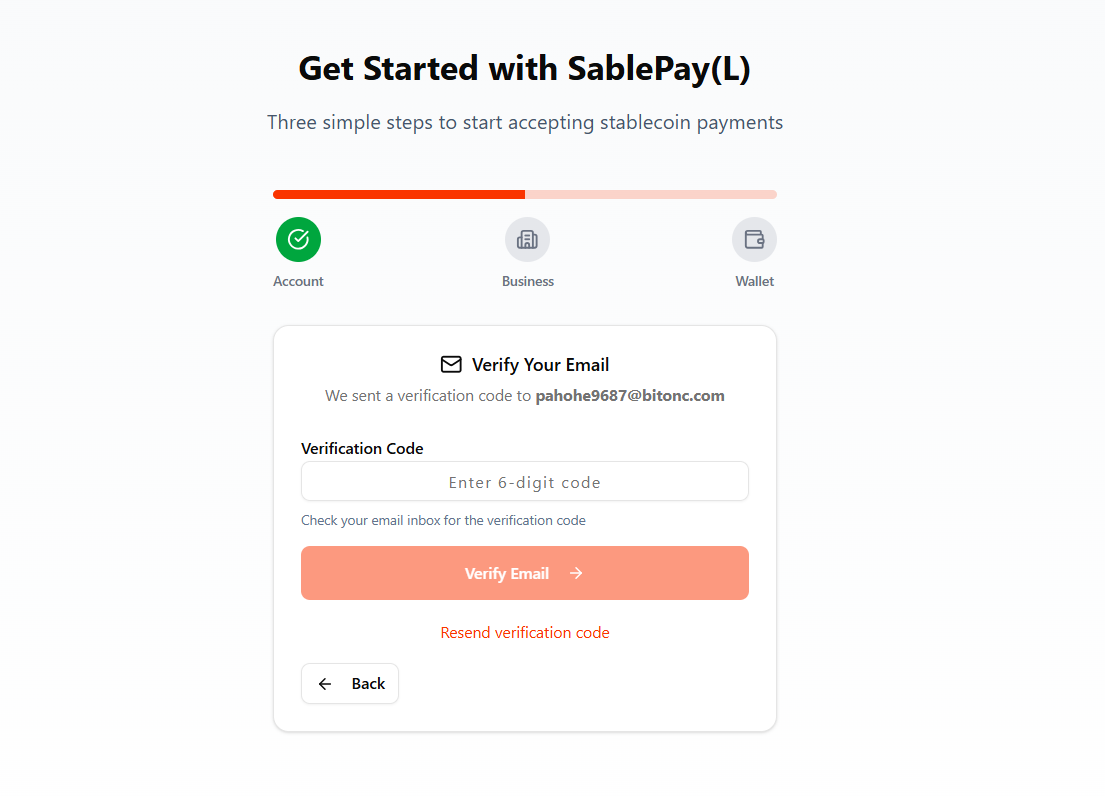
Figure 2: The email verification screen with 6-digit code input
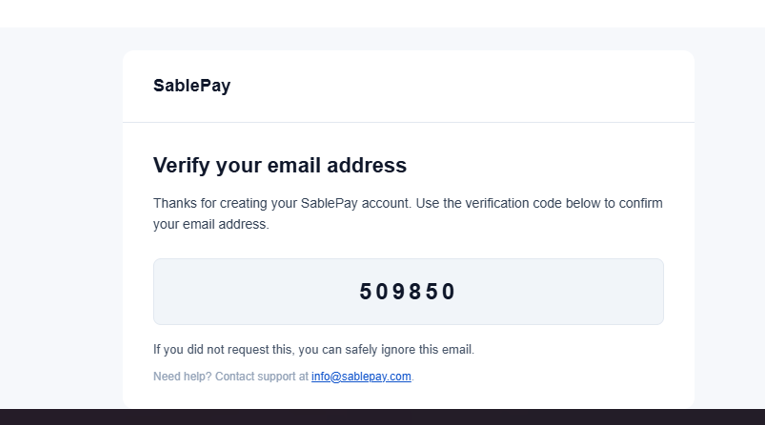
Figure 3: The actual OTP verification email with the 6-digit code
After verifying your email, you'll be redirected to the login page. Enter your credentials to access your account.
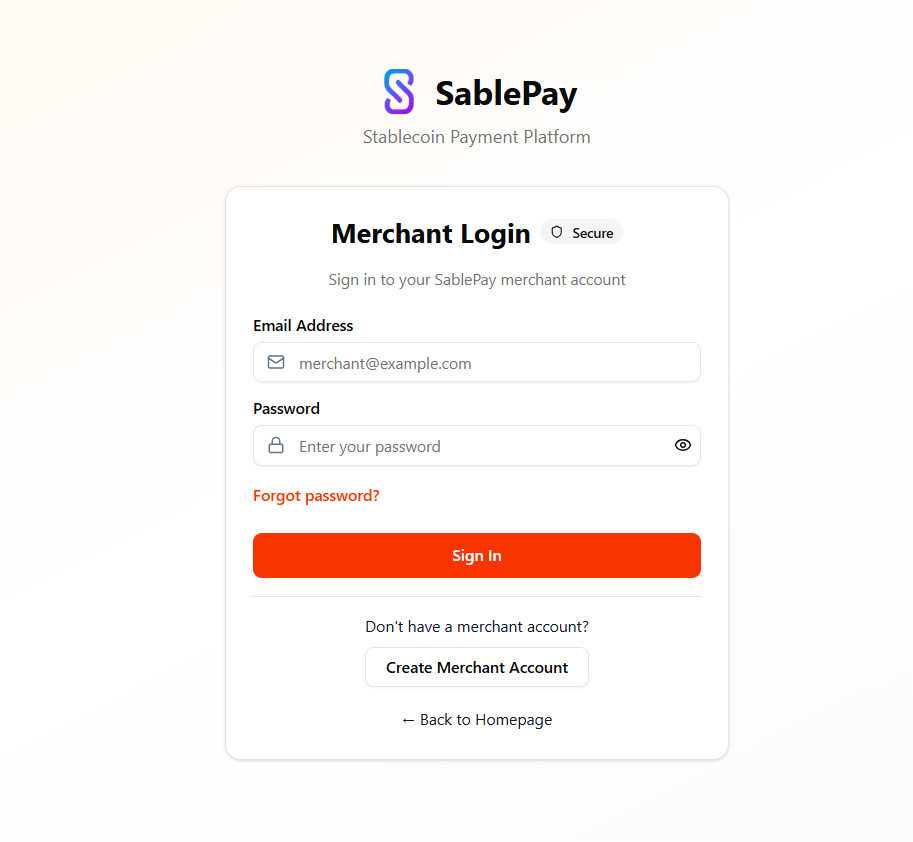
Figure 4: Login page with email and password fields
Login Steps
- 1Enter your registered email address
- 2Enter your password (use the eye icon to toggle visibility)
- 3Click "Sign In"
After your first login, you'll be taken to the business verification step. This is required before you can start accepting payments. Fill in your business details accurately.
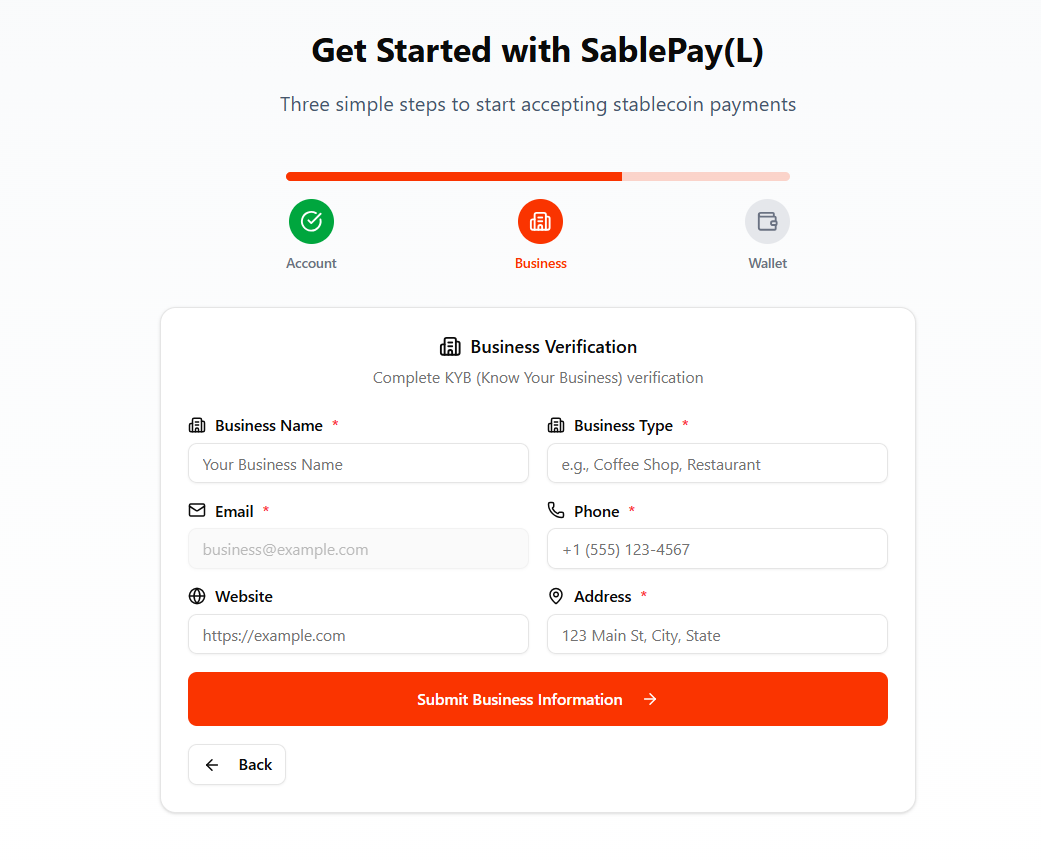
Figure 5: The KYB business verification form with required fields
Required Business Information
| Field | Required | Description |
|---|---|---|
| Business Name | Required | Your registered business or DBA name |
| Business Type | Required | e.g., LLC, Corporation, Sole Proprietor |
| Auto-filled | Pre-filled from registration (read-only) | |
| Phone | Required | Business contact phone number |
| Website | Optional | Your business website URL |
| Address | Required | Business street address |
Connect a crypto wallet where you'll receive USDC stablecoin payments. SablePay supports wallet connections through Mesh Connect (exchange accounts like Coinbase, Binance) and popular DeFi wallets like MetaMask and Trust Wallet.
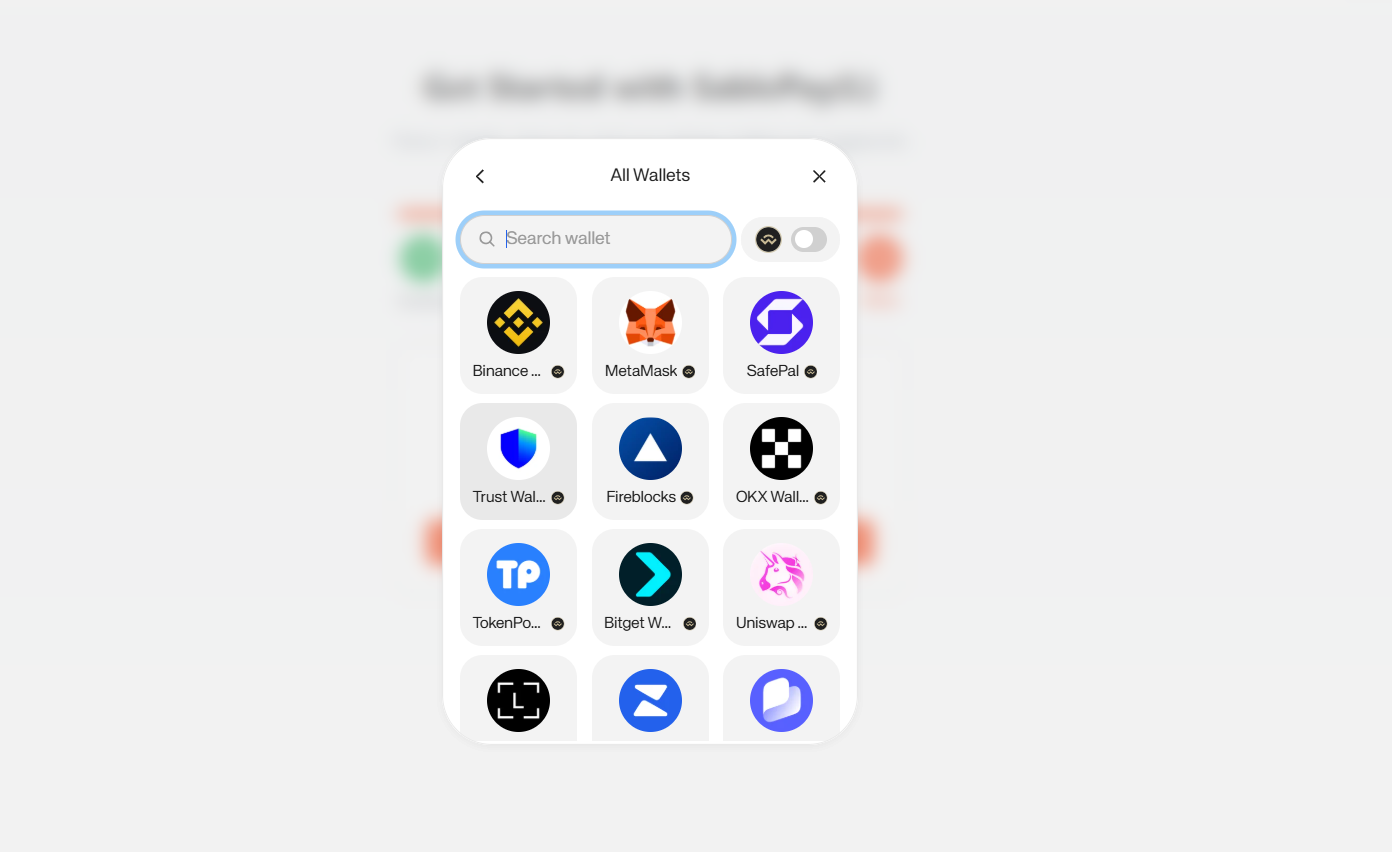
Figure 6: Wallet connection screen showing available wallet and exchange options
Exchange Accounts
- Coinbase
- Binance
- Kraken
- Other supported exchanges
DeFi Wallets
- MetaMask
- Trust Wallet
- Rainbow
- Any supported EVM wallet
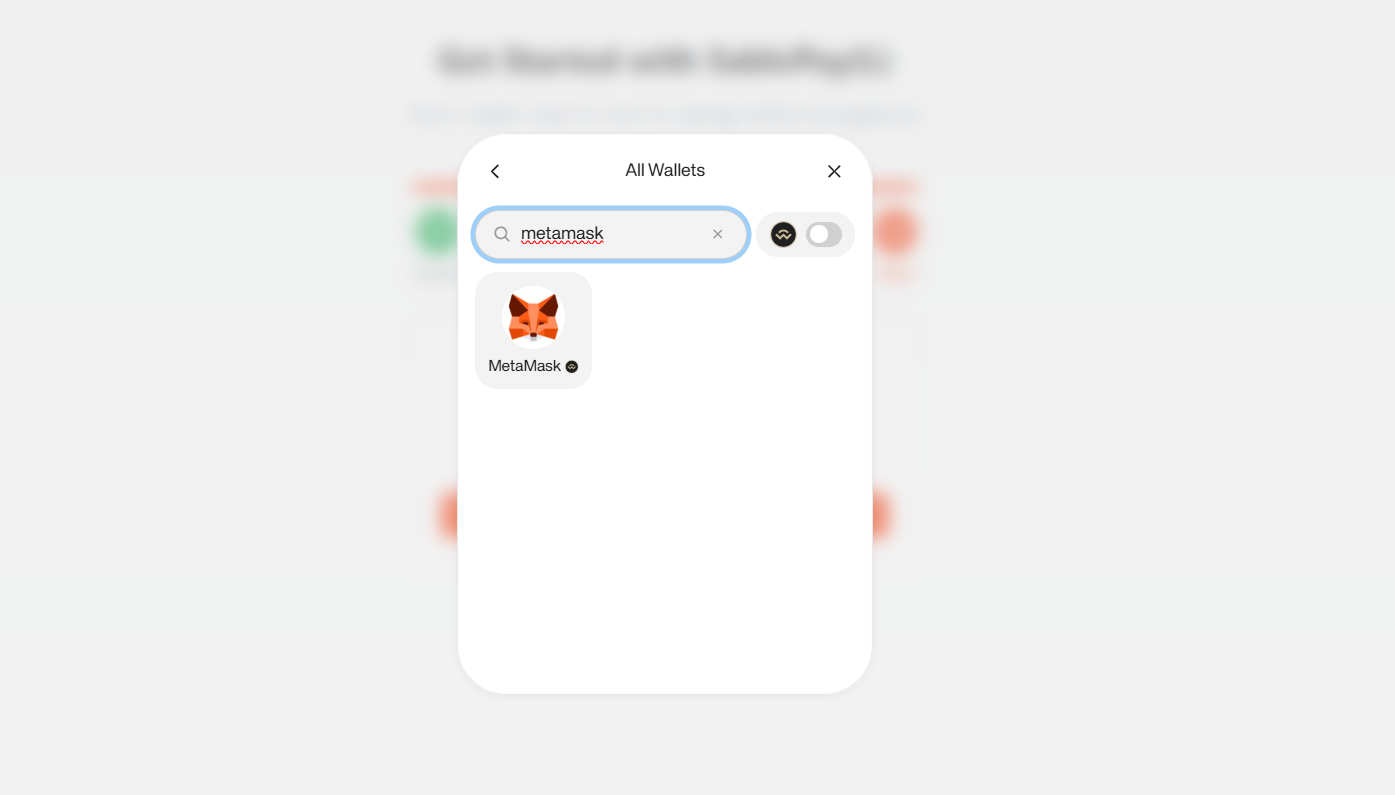
Figure 7: Connecting MetaMask wallet to SablePay
The Dashboard is your central command center. It provides real-time KPIs, revenue charts, and a detailed transaction table with filtering and export capabilities.
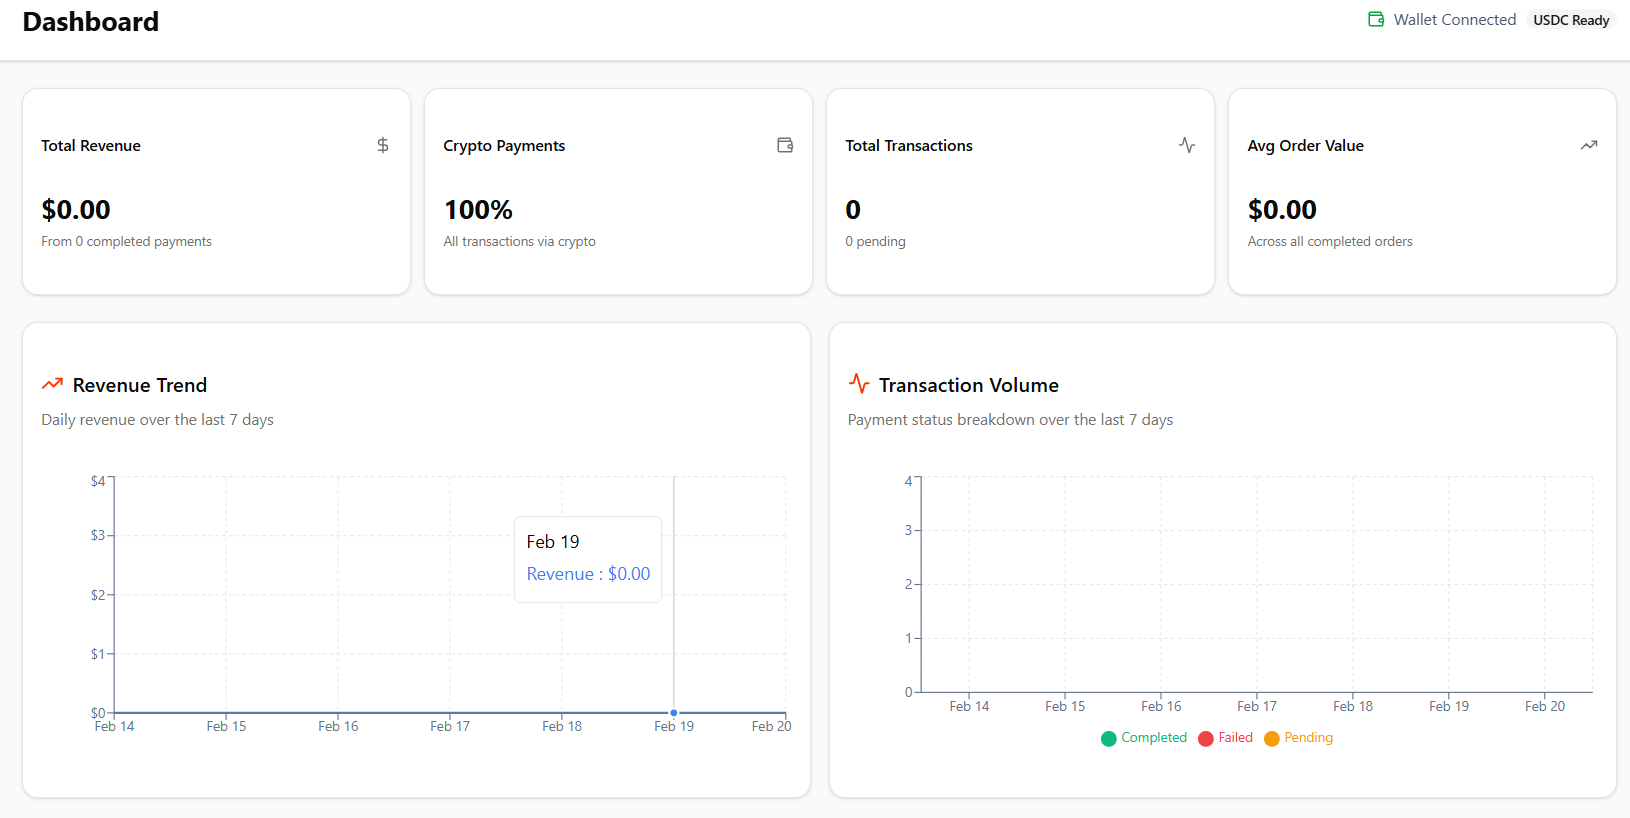
Figure 8: The merchant dashboard with KPI cards and overview
Dashboard Components
KPI Cards (Top Row)
Charts
- Revenue Trend – Area chart of daily revenue over the last 7 days
- Transaction Volume – Stacked bar chart (completed/pending/failed)
Transaction Table
- Column-wise search filters (Transaction ID, Terminal, Amount, Status, etc.)
- Sortable columns – click any header to sort ascending/descending
- Copy Transaction ID with one click
- View on-chain transaction via Etherscan link
- Export all transactions as CSV
- Pagination with 10 records per page
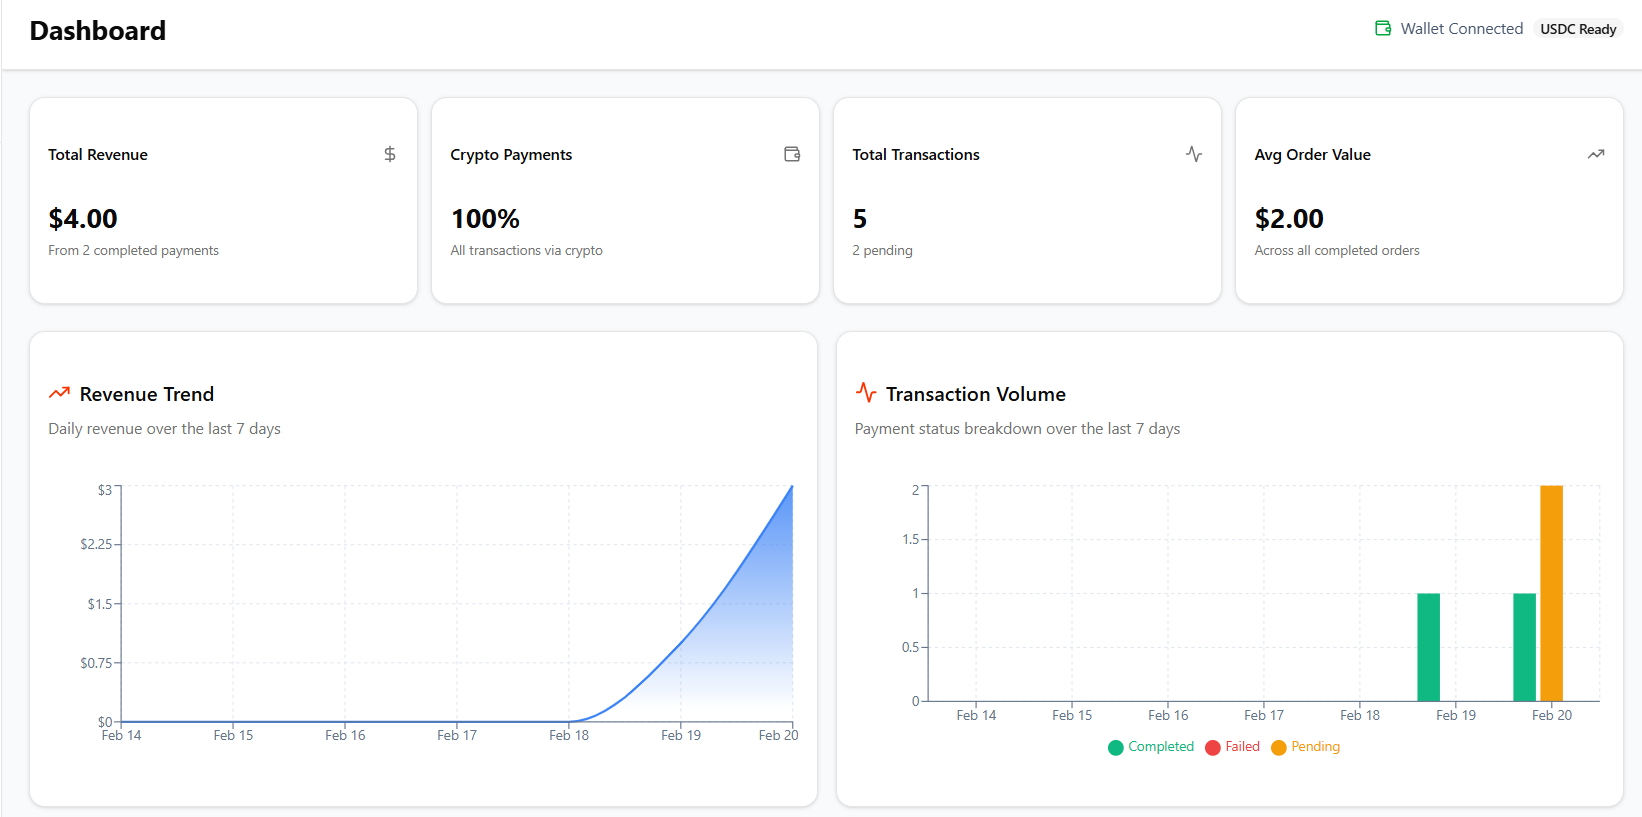
Figure 9: Revenue trend area chart and transaction volume bar chart
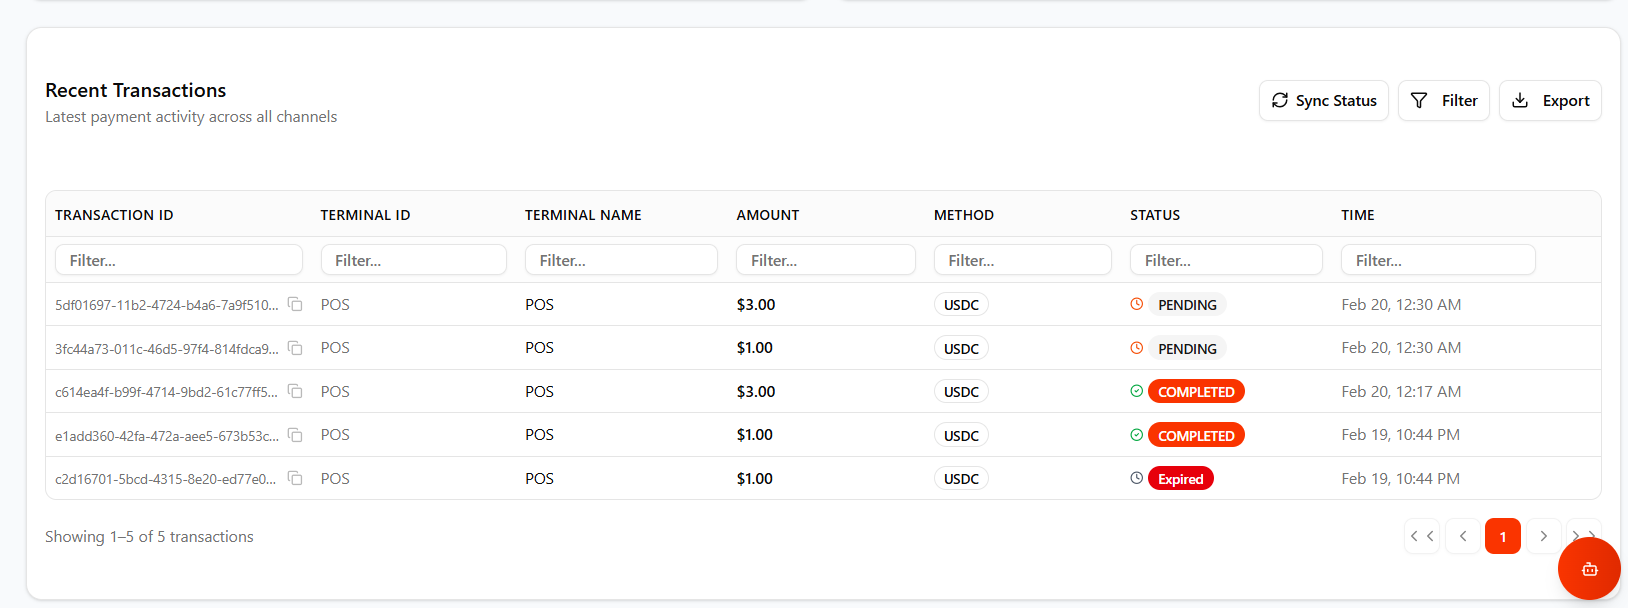
Figure 10: The transaction table with column filters, sorting, and export
SablePay includes a built-in Point of Sale (POS) system. Navigate to POS System from the sidebar to start accepting payments immediately – no coding required.
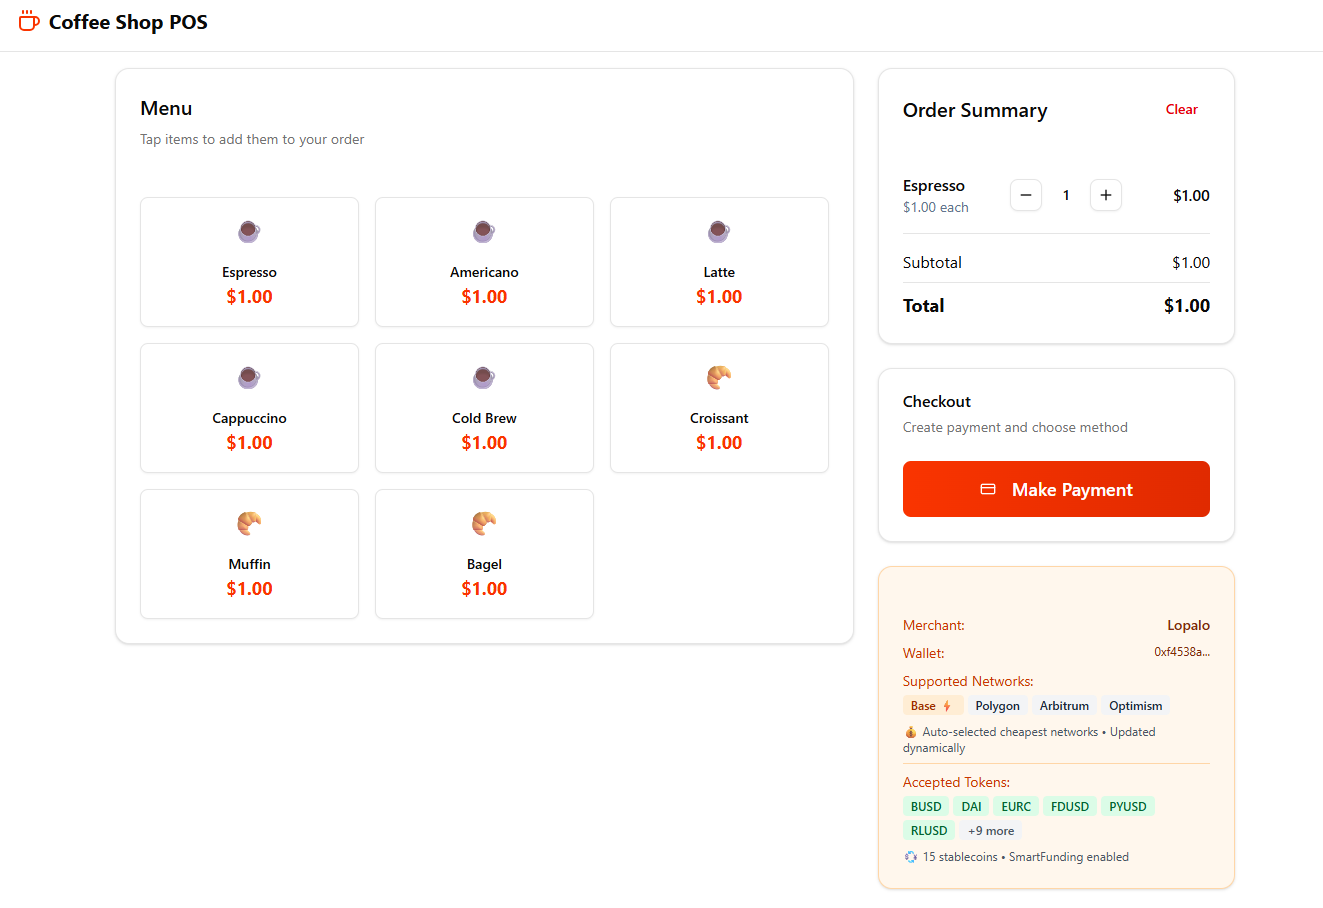
Figure 11: The POS menu screen with items, order summary, and checkout options
Payment Flow
Build the Order
Tap items on the menu grid to add them to the cart. Adjust quantities with the +/– buttons.
Checkout
Click "Pay with QR Code" to generate a payment QR code, or use "Make Payment" for the SDK-powered payment flow.
Customer Pays
The customer scans the QR code with their crypto wallet app, or clicks the payment link. They select their preferred network and confirm the USDC transfer.
Payment Confirmed
The system automatically polls for payment status. Once confirmed on-chain, the success screen appears with the transaction hash and amount.
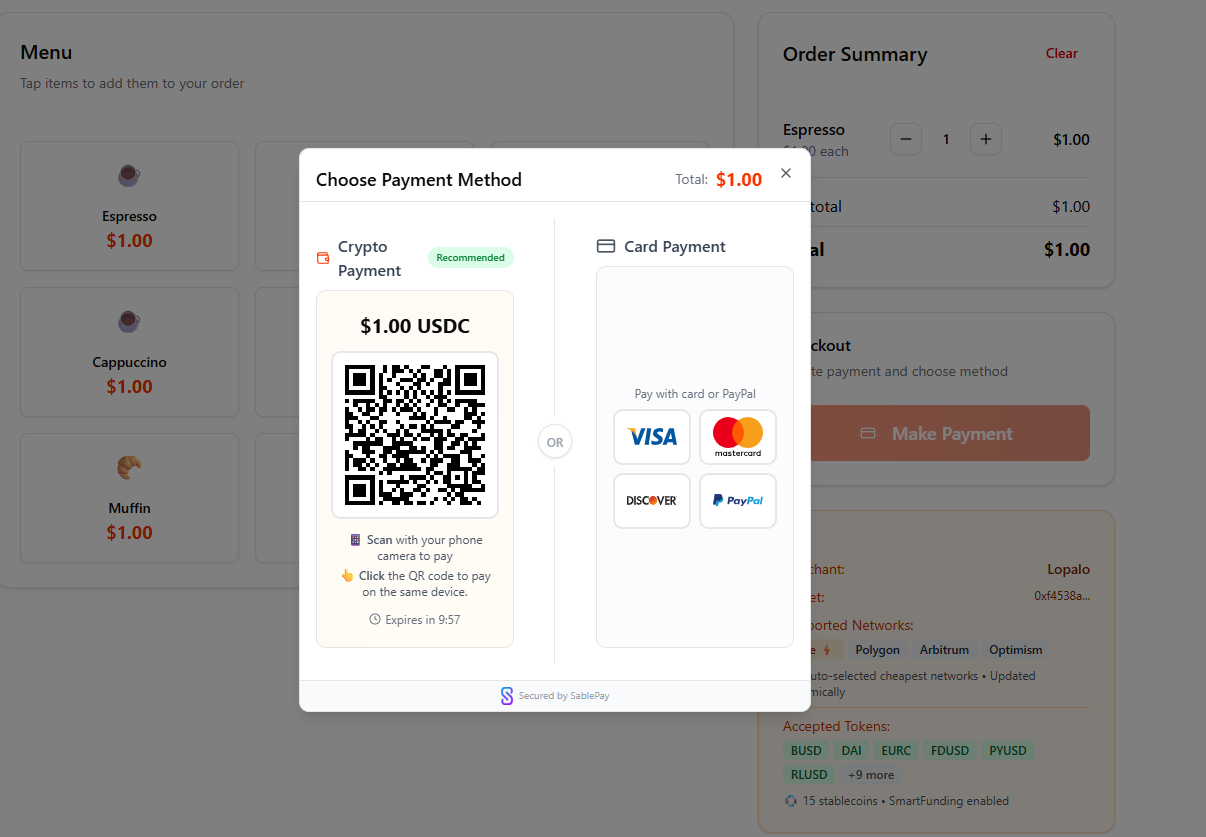
Figure 12: QR code displayed for customer scanning
Customer Payment Experience (Mesh Connect)
When the customer clicks the payment link or scans the QR code, they go through the Mesh Connect flow to complete the payment:
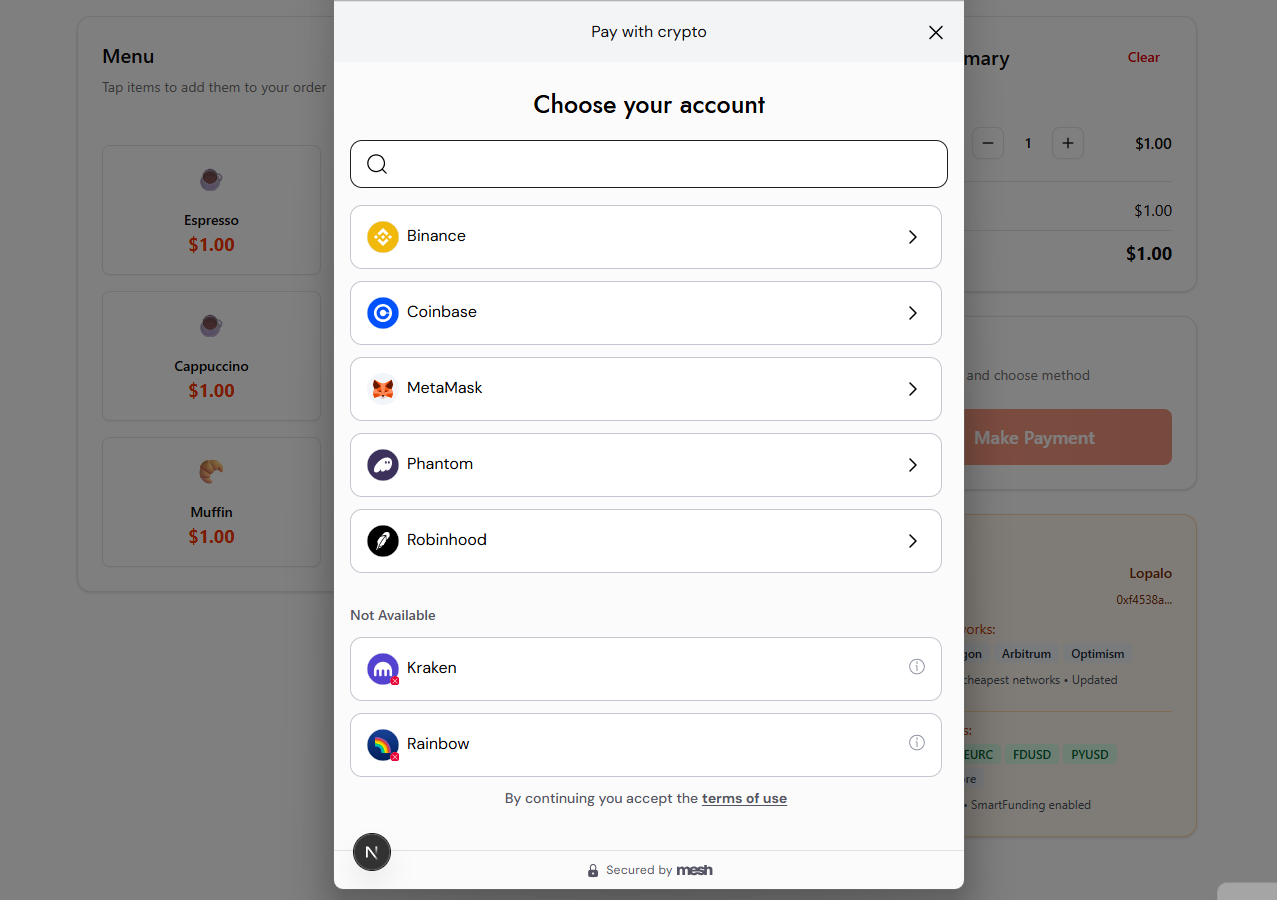
Figure 13: Customer chooses their exchange or wallet account
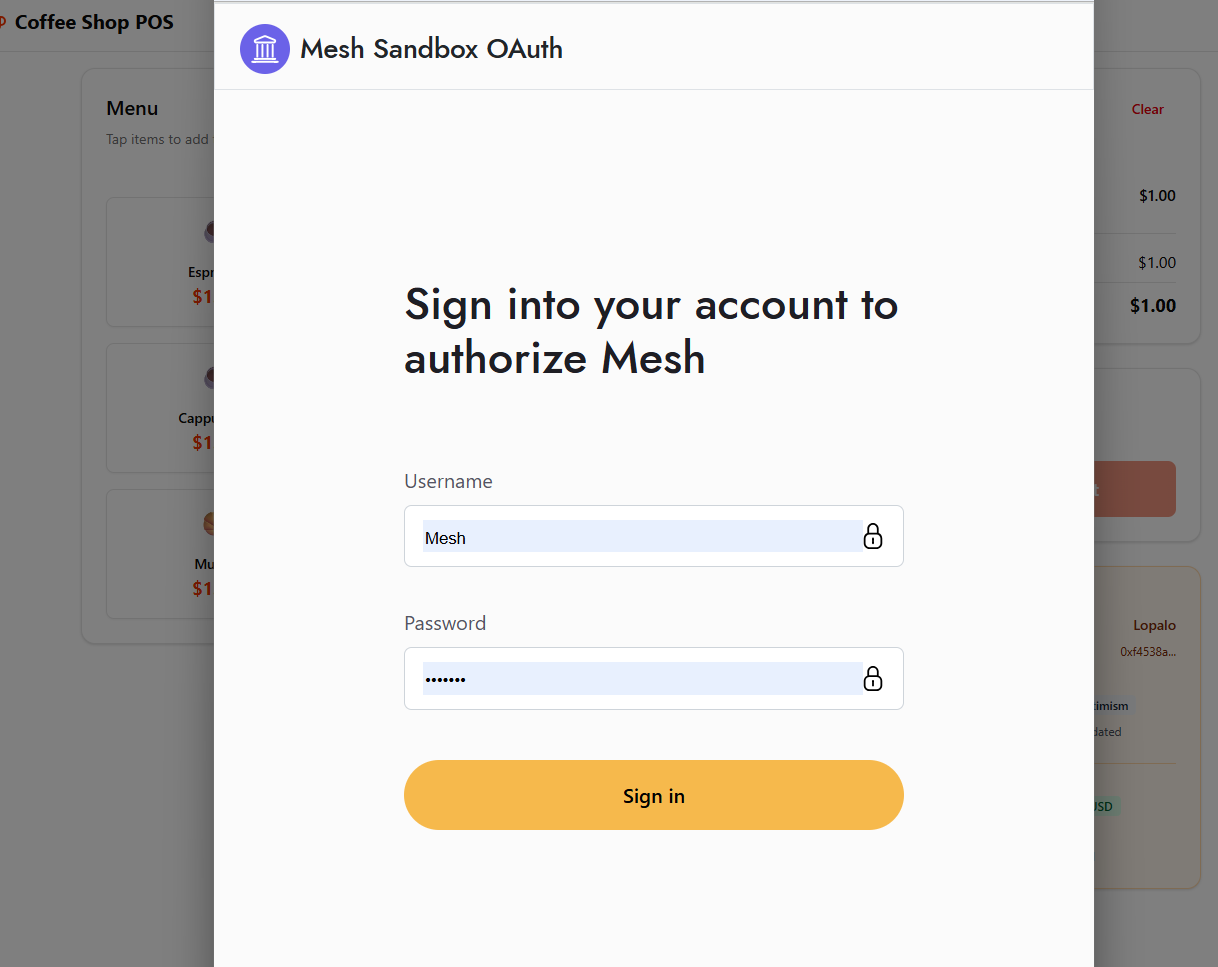
Figure 14: Mesh sandbox account selection for testing (Username : Mesh & Password : Mesh1234)
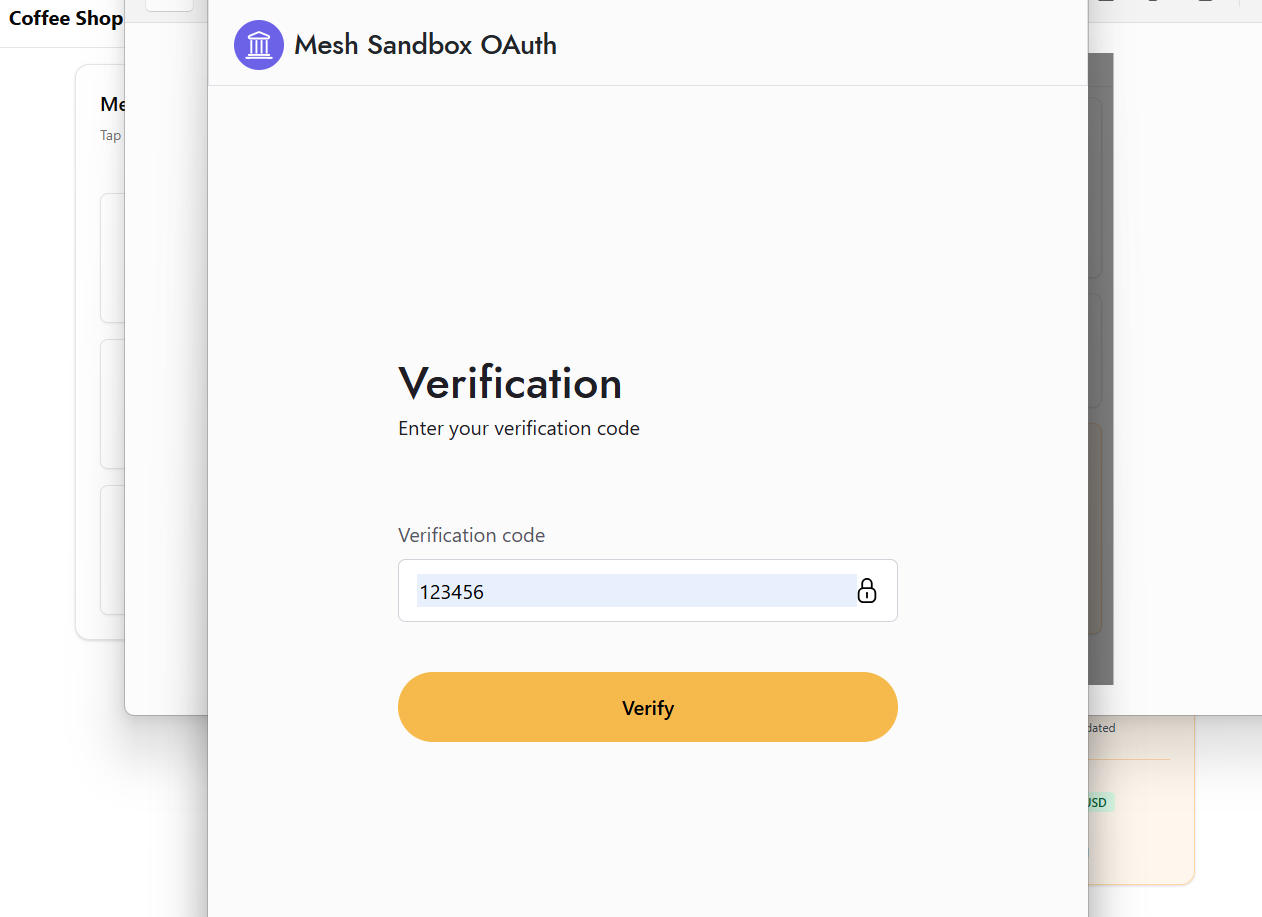
Figure 15: Account verification step in payment flow (Verification code is 123456 in sandbox mode)
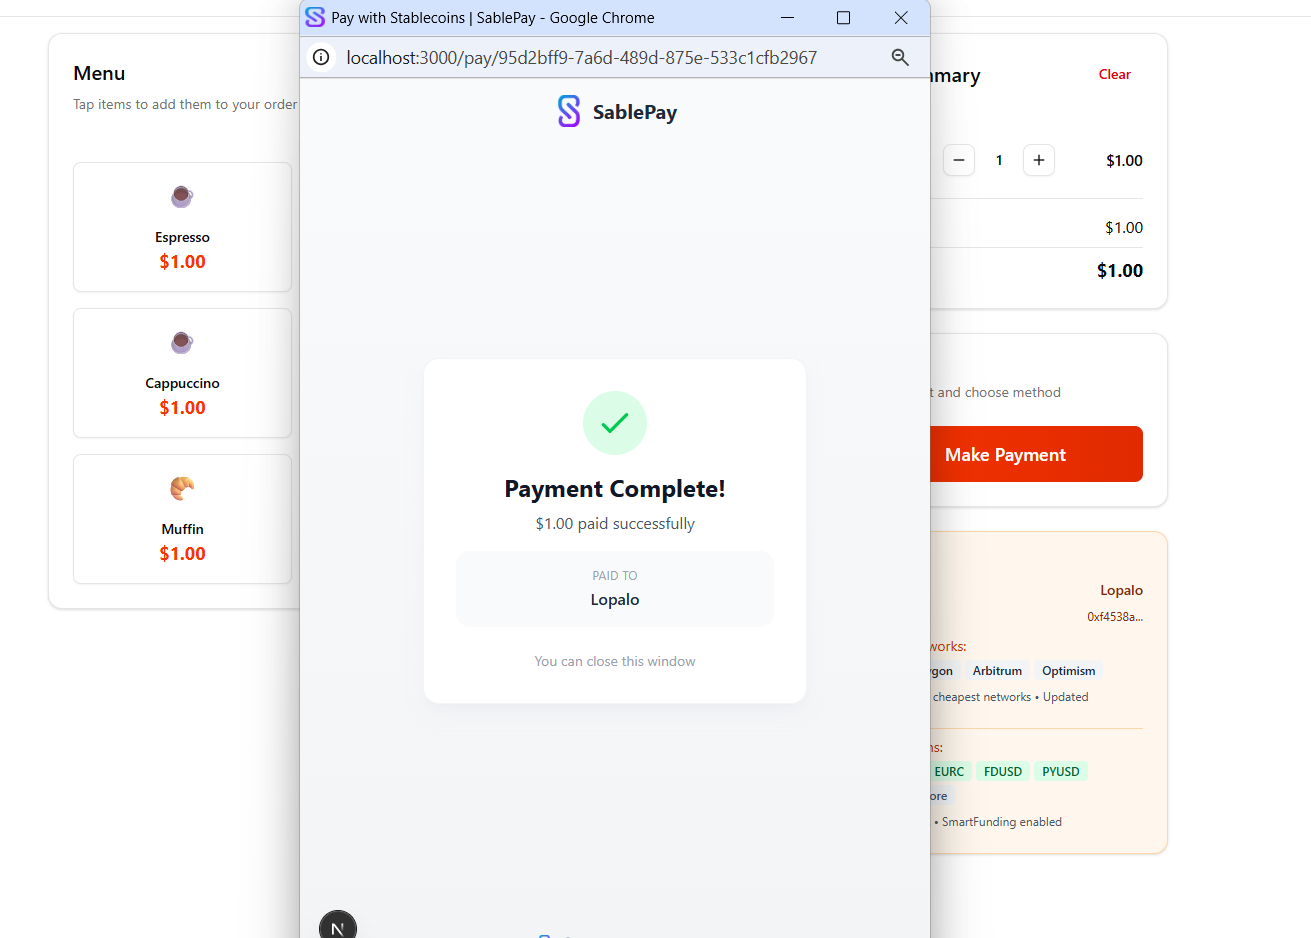
Figure 16: Payment confirmed successfully with transaction details
Navigate to API Keys in the left sidebar to manage your keys. Each API key is tied to a terminal (e.g., "POS Terminal 1", "Website Checkout", "Mobile App").
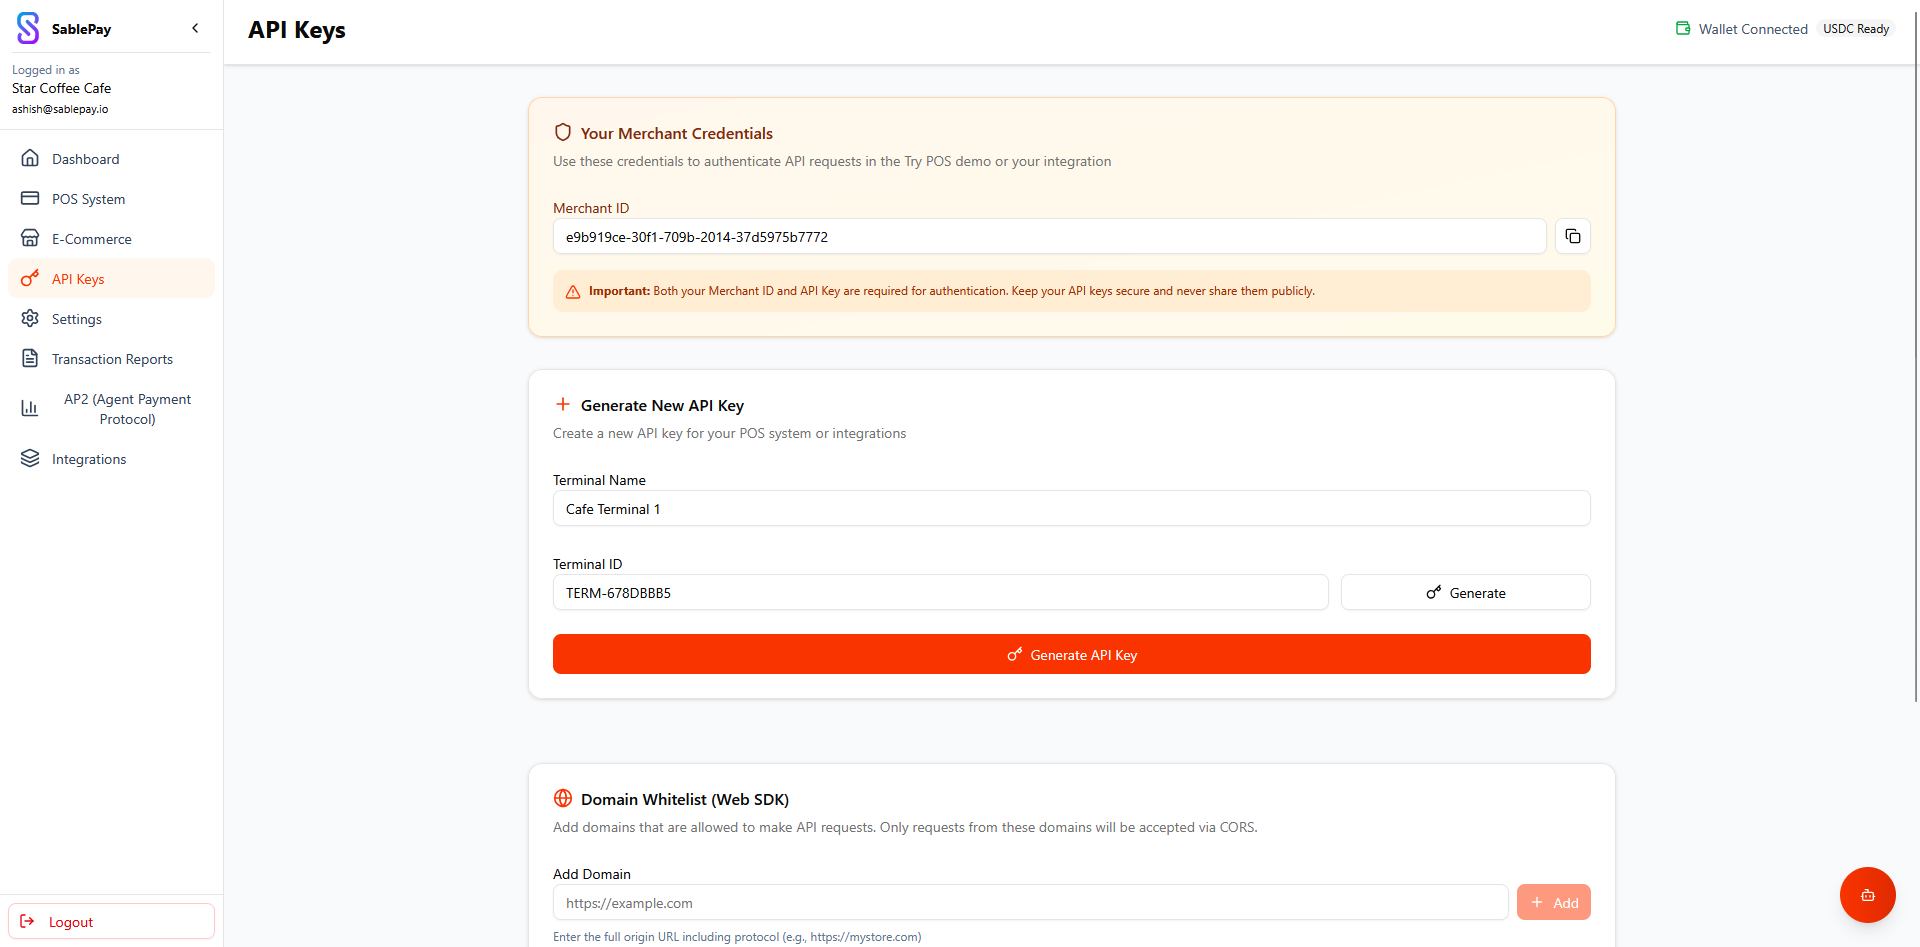
Figure 17: The API Keys management page with key table and generation form
Generating a New API Key
- 1Enter a Terminal Name (e.g., "My POS", "Website")
- 2Optionally enter a Terminal ID (auto-generated if left blank)
- 3Click "Generate API Key"
- !Copy and securely store your key immediately – it is only shown once and cannot be retrieved later!
Key Management Features
- Revoke Keys – Instantly disable compromised or unused keys
- Webhook Configuration – Set up webhook URLs per key for real-time payment notifications
- Domain Whitelist – Restrict API access to specific domains for CORS security
- Auto-Expiration – Keys expire after 90 days with rotation reminders at 75 days
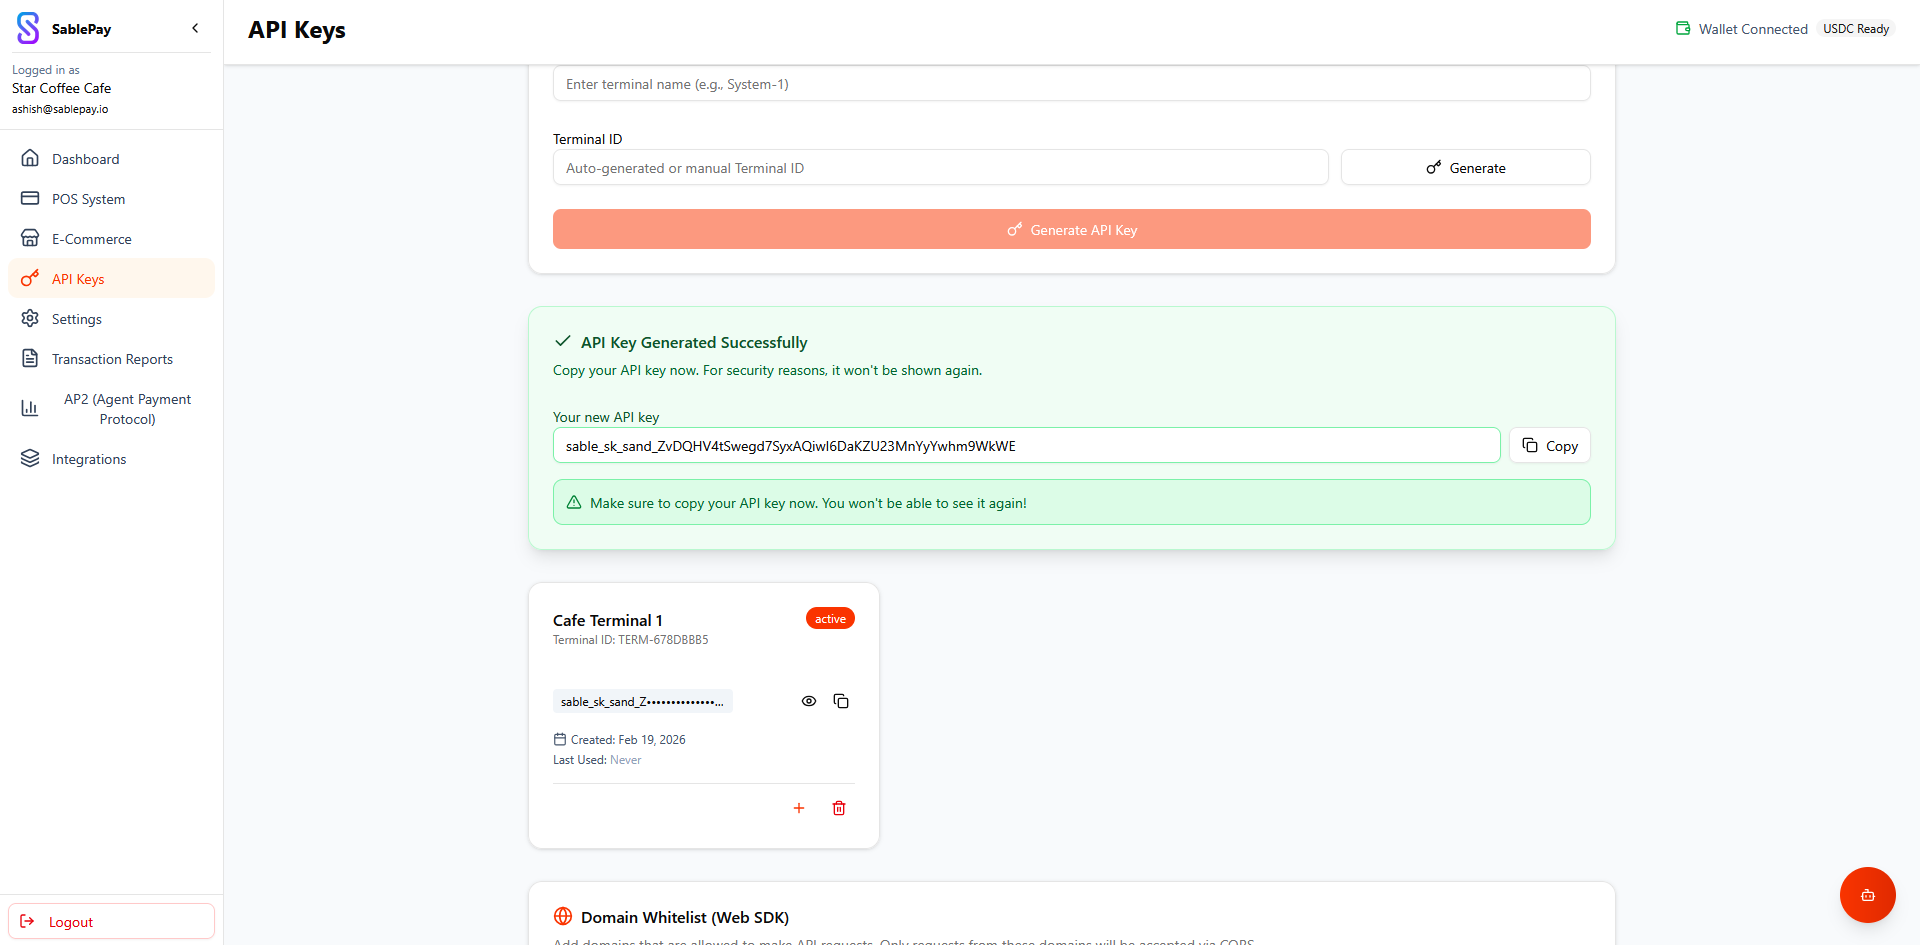
Figure 18: A newly generated API key – copy it immediately
The SablePay sandbox environment lets you test the complete payment flow without using real cryptocurrency. All sandbox transactions are simulated and no real funds are moved.
Sandbox Environment
https://sandbox-api.sablepay.iohttps://sandbox.sablepay.ioSandbox API Key Format
Sandbox API keys always start with sable_sk_sand_ and are 58 characters total.
# Sandbox API Key Format
sable_sk_sand_XXXXXXXXXXXXXXXXXXXXXXXXXXXXXXXXXXXXXXXXXXX

# Example (not a real key):
sable_sk_sand_aBcDeFgHiJkLmNoPqRsTuVwXyZ0123456789_abcde
How to Get Your Sandbox Credentials
- 1Register at sablepay.io/onboarding – sandbox accounts are approved instantly
- 2Complete KYB – in sandbox, business verification is auto-approved
- 3Connect any wallet – use a test wallet for sandbox testing
- 4Go to API Keys page and generate your sandbox API key
- 5Find your Merchant ID – visible on the API Keys page and in the Settings > Account tab
Quick Test – Create a Sandbox Payment
Once you have your sandbox API key and Merchant ID, try this API call:
curl -X POST "https://sandbox-api.sablepay.io/api/v1/payments/create" \
  -H "Content-Type: application/json" \
  -H "X-API-Key: sable_sk_sand_YOUR_SANDBOX_API_KEY" \
  -H "X-Merchant-ID: YOUR_MERCHANT_ID" \
  -d '{"amount": 5.00}'
Expected response: A JSON object with payment ID, QR code data URL, and payment link.
Sandbox vs Production
| Feature | Sandbox | Production |
|---|---|---|
| API Key Prefix | sable_sk_sand_ | sable_sk_live_ |
| KYB Verification | Instant approval | Manual review (up to 24h) |
| Real Funds | No | Yes |
| Mark as Paid | Available | N/A |
| Blockchain | Simulated | Real on-chain settlement |
| Rate Limits | Same as production | 20 auth/min, 30 create/min |
sable_sk_live_ API key and updating your API base URL to https://api.sablepay.io.Navigate to E-Commerce in the sidebar to set up online payment acceptance for your website or web application. This module provides tools for integrating SablePay into your existing e-commerce checkout flow.
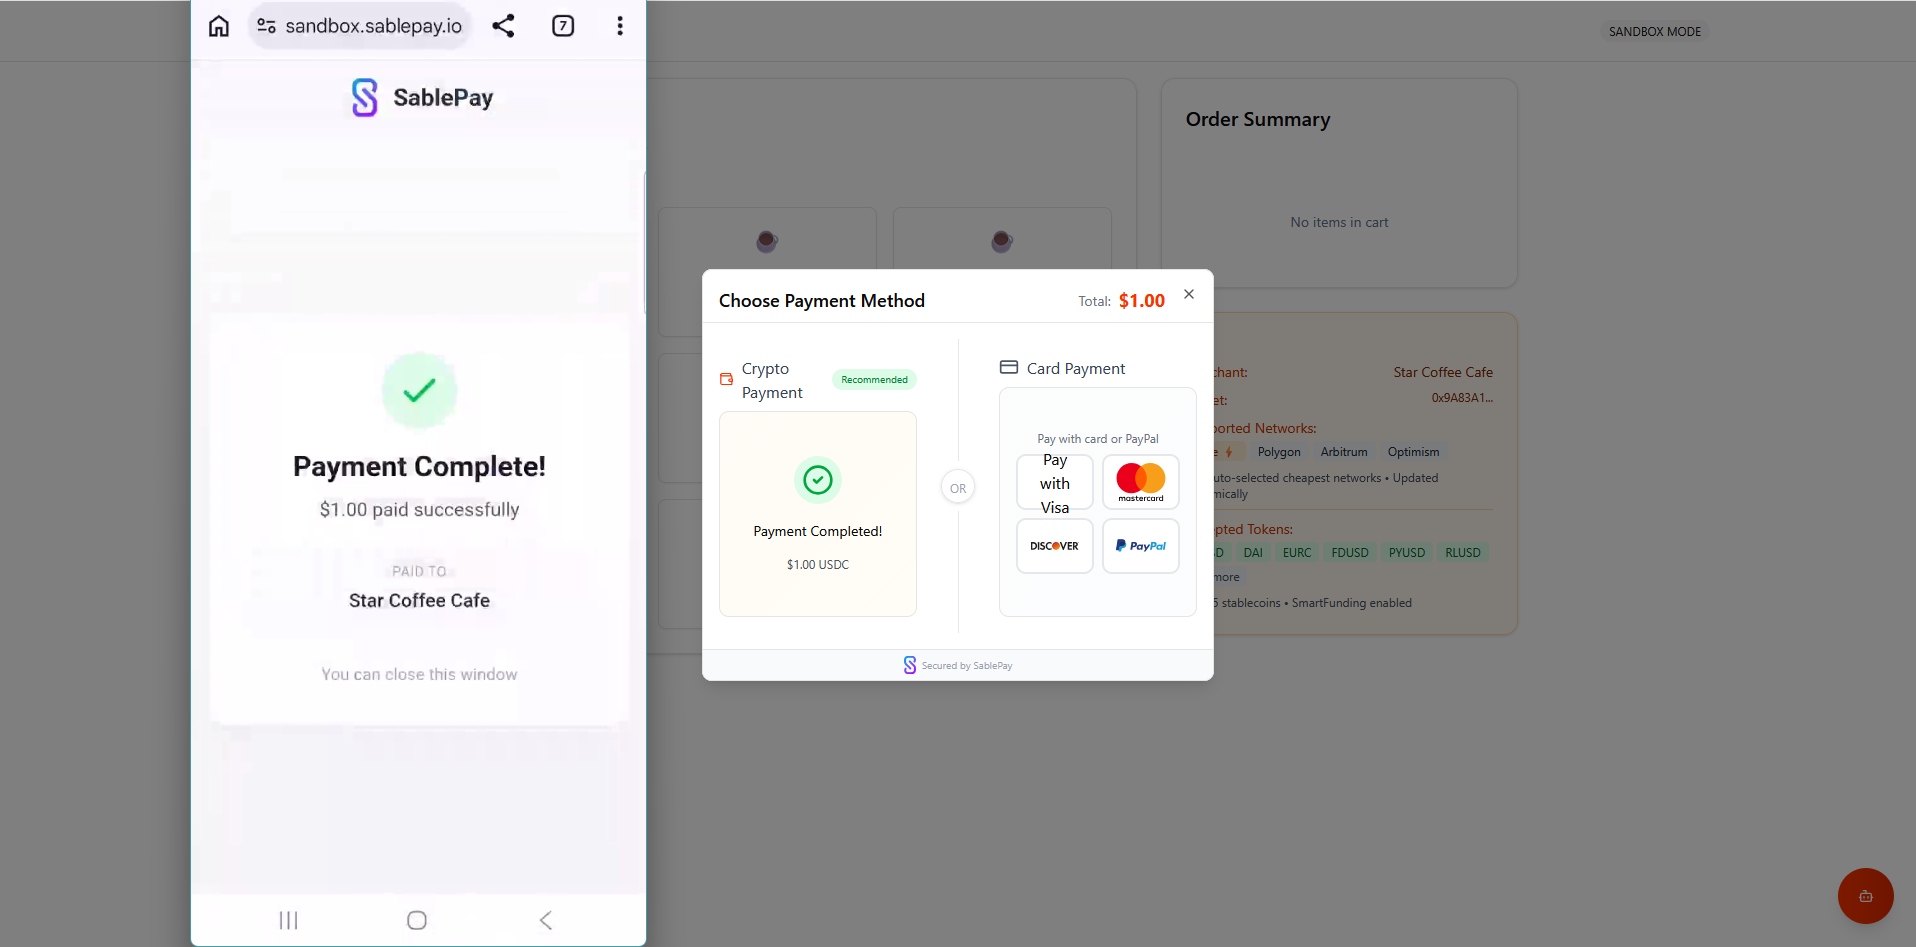
Figure 19: The E-Commerce integration page for online store checkout
E-Commerce Features
- Payment Links – Generate shareable payment links for invoices and online orders
- Checkout Widget – Embed a payment widget directly into your website
- Order Management – Track and manage online orders from the dashboard
- Multi-Network Support – Customers can pay on their preferred blockchain network